DIY Standing Desk Speaker Stands

Problem statement
Depending on your taste, you may find the speakers built into your computer sufficient for most of your listening needs. A common upgrade is a pair of computer speakers like these. For me, I’ve gone Full Bookshelf. Wonderful as these are, they take up a fair amount of space, and require an amplifier to work with a computer. These small stands can be used to tilt the speakers up at the listener’s ears, though still requiring most of the same footprint on one’s desk.
Occasionally I see pictures of peoples’ desk setups. Most often, speakers are placed at ear level (good!) with the use of a monitor riser section of the desk. In other cases, speakers might be placed on speaker stands slightly behind the desk. While this works well enough for standard desks, standing desks cannot use this same design. The riser solution might work, but many standing desks I’ve seen do not have one built-in.
Investigation
After poking around a bit, I did find this product from a California-based company. Unfortunately the quoted price of about $320 plus tax and $30-60 shipping put me off completely. I don’t think it would have worked in any event. The design assumes the bookshelf speaker would be attached to the stand via screws (I would prefer not to damage the speaker) or some sort of semi-permanent adhesive that would probably not be strong enough for my speakers at 16 pounds each (and would probably mar the vinyl surface if removed). In addition, it places the speaker past the rear or side edge of the desk, which was not compatible with my desk being up against a wall and flanked by two relatively narrow corridors.
I decided that a DIY solution would be the best for my use, as well as price.
I initially attempted to use a pair of speaker stands I already owned, very similar to these. Removing the base, I inserted the pole sections into a Tiki torch clamp and attempted to clamp them to my desk. While not terribly happy with the the long pole standing vertically behind the desk, I found the solution decent in principle, but a failure in practice. The mount, intended for much lighter Tiki torches, could not sufficiently hold the weight of the stands. Further, the gauge of the steel and the quality of the welds was far too low; I’m not sure I’d even recommend these for their intended purpose. I broke a weld and bent the metal significantly with just the torque I could apply with my hand and forearm. I do not believe these would be trustworthy with a flaming torch attached.
A better implementation
Still, the test did prove out the idea, even if it demanded a better implementation. My next investigation focused on two products that might be melded together to get the result I wanted. Part one: a monitor desk clamp with no arm, which might be stronger than one with an arm. Part two: a wall mounted bookshelf speaker mount. Initially I had planned to build some sort of adapter plate to join the VESA mount of the monitor stand with the wall mount of the bookshelf mount.
I settled on these two products: the Suptek Monitor Stand Desk Mount Bracket and the WALI Dual Side Clamping Bookshelf Speaker Wall Mounting Bracket.
Initially, I used some scrap aluminum to allow me to connect the plate of the bookshelf mount to that of the VESA mount included with the monitor stand. Unfortunately, while the stand is rated for a monitor up to 22 pounds or so, it was intended for the weight of the monitor to be relatively close to the stand. In my setup, the weight was much further out, creating enough torque to bend the tilt mechanism significantly.
As a result, I ditched the tilt mechanism and found I could rotate the mount for the tilt 90 degrees. Interestingly, a small indentation in the bookshelf plate lined up with the bottom tongue of the pole clamp, which allowed me to attach the bookshelf mount with a single screw and stabilize it vertically. While not ideal, it turned out to be surprisingly sturdy.
That said, I decided I did not want to trust a single screw for this job, and I looked for a pole mount plate that might give me a more stable connection between the bookshelf mount and the pole. This VideoSecu Pole Mounting Bracket served quite well and happened to align very well with the vertical holes in the bookshelf mount plate.
Instructions for version 1
Parts list:
- Suptek Monitor Stand Desk Mount Bracket
- WALI Dual Side Clamping Bookshelf Speaker Wall Mounting Bracket
Price at time of order:
- Suptek: $23.99 x 2
- WALI: $25.49
Total cost: ~$75
1. These are the parts you’ll need from the Suptek Monitor Stand Desk Mount Bracket.

2. These are the parts you’ll need from the WALI Dual Side Clamping Bookshelf Speaker Wall Mounting Bracket.

3. Attach the clamp to the pole. See the Monitor Stand instructions for more details.

4. Remove the tilt mechanism using the included hex wrench from the pole mount. You should end up with the pieces in the second picture.


5. Undo the vertical bolt holding the tilt mechanism block that allows you to rotate the block horizontally. Rotate the block 90 degrees so one of the screw holes is pointing forward. Screw down the vertical bolt tightly so the block does not rotate.

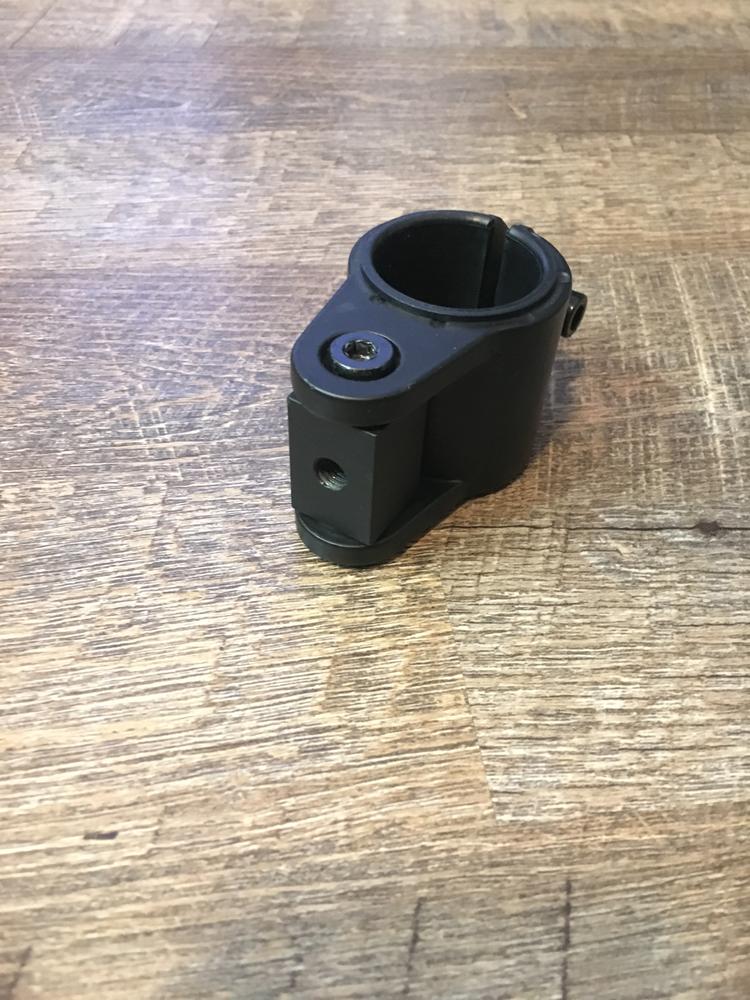
6. Attach the pole mount to the pole.

7. Using one of the screws removed in step 4, attach the bookshelf arm and plate to the pole mount.

8. Attach the bookshelf clamp to the arm per the instructions, attach the whole assembly to your desk, and mount the bookshelf speakers to the mounts. I recommend using a level on top of the speaker to center it before tightening the bottom nut on the bookshelf clamp with the included wrench. You’re done!

Instructions for version 2
Parts list:
Price at time of order:
- VideoSecu: $12.99 x 2
Total cost: ~$100
These instructions are similar to V1 up to step 4. Instead of using the pole clamp, we use the VideoSecu Pole Mounting Bracket. The rest of the instructions from step 6 onwards are similar as well. It turns out the screws included with the VideoSecu are long enough and wide enough to work for this application, though if you really want to go the extra mile, you can add a washer on the screw head side along with a nylon lock nut to make sure the screw never loosens, though you’d need a longer screw of the same thread in both these cases. I’d also recommend using some high friction material (like some rubber strips, if you have them) to protect the finish of the pole from the VideoSecu’s pole clamps, as they will mar the surface when tightened. I ended up using some non-slip drawer liner I had lying around.